BACK TO BRICK


Tackling Damp and Insulating walls
In 2020, during lockdown, I was furloughed, which gave me a rare opportunity to focus full-time on our house renovation while still earning a wage to fund the materials. The timing was intense—my partner was six months pregnant, and we had a one-year-old, so the pressure was on. Our house was cold and damp, and we quickly realised that simply skimming the walls wouldn’t be enough to modernise it for a growing family. We needed to treat the damp and insulate the walls to make the house warm and comfortable.
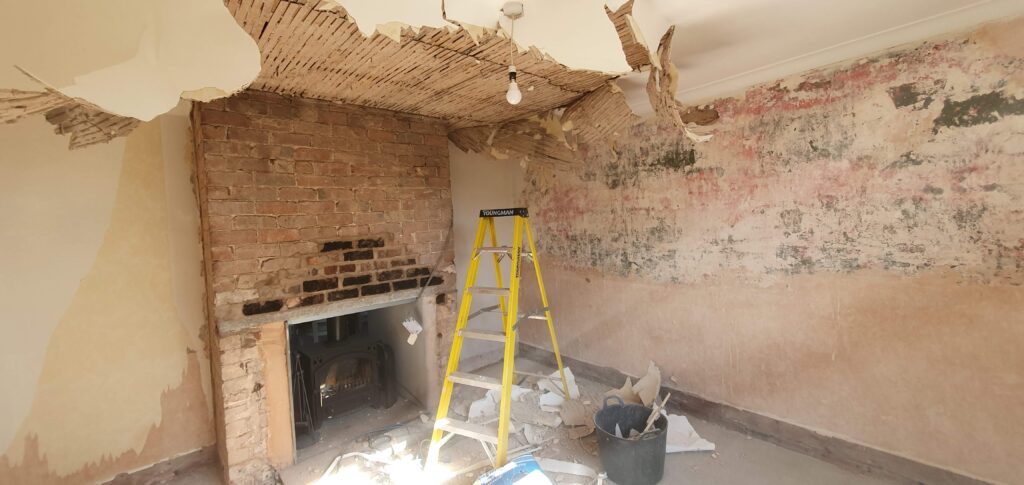
Being on oil heating, which I must say is more efficient than I initially thought (I’ll explain why in a later post), we needed to keep the heat in and the cold out. Our main challenge was the damp, solid walls with no cavity. First things first, we stripped back the 120-year-old plaster (complete with horsehair!) to assess the walls underneath. The best tool for the job turned out to be an old crowbar. It was hard work, but once I got the bar behind the plaster, I could pop chunks off the wall. Sure, there’s a hammer drill attachment you can buy, but I managed to strip the downstairs rooms in about a week. The shovelling and skip-filling were brutal on the shoulders, and I’m sure I’ll feel that in the years to come!
Our house has solid walls with no cavity, they should breathe with the lime mortar and traditionally 100 years ago that worked with open fires on and no bathrooms, however with double-glazing modern living and no open fires houses now get damp. At some point, ‘Wally Damp Man’ had been in to scam the poor lady before us and injected all the walls with a chemical damp course, plastered the bottom half with heavy-duty cement and bridged the wall right down to the damp quarry tile floor—this only trapped moisture in the brick, causing more problems.
After researching, we found Safeguard Dryrods via Skill Builder and the Rodger Bisby channel, which were a game-changer, you can find a link in the shop. They’re easy to install—just drill them into the mortar at the proper intervals (video link here https://www.youtube.com/watch?v=irytqcJZSps). These then dissolve with the moisture and chemically sealing the mortar stopping damp from wicking up the wall and into the plaster. Despite working late into the night and annoying the neighbours, I managed to finish the downstairs in one evening. Now, five years on, we’ve had no damp issues on any of the walls.
For the external walls, we opted to baton and insulate using PIR insulation boards. While we could have taken advantage of a government grant for external insulation, we wanted to preserve the house’s original features and avoid turning it into a modern, rendered box. So, internal insulation was our solution, and it’s made a world of difference.
Stripping Back for a Full Rewire and Replumb
Another major advantage of stripping the walls and ceilings back was that it allowed us to easily rewire and replumb the entire property—both of which were long overdue. Over the years, the house had seen some attempts at modernization, like adding radiators and rewiring sections of the old rubber wiring. But this was all done on the surface, with unsightly trunking hidden under layers of woodchip wallpaper—unbelievable!
With everything stripped back, the electricians got the first fix done in no time. I took the opportunity to embed the plumbing into the walls, using a mix of plastic and copper pipes. Plastic is incredibly easy to work with, and I haven’t had a single leak from plastic fittings. One of the big benefits is that with long rolls of plastic pipe, I was able to replumb the entire house from the downstairs without disturbing the upstairs floors. This was a lifesaver, as it meant we still had a space to live in during the renovation. Plus, I could use one continuous piece of pipe for each full run, minimizing the need for connections.
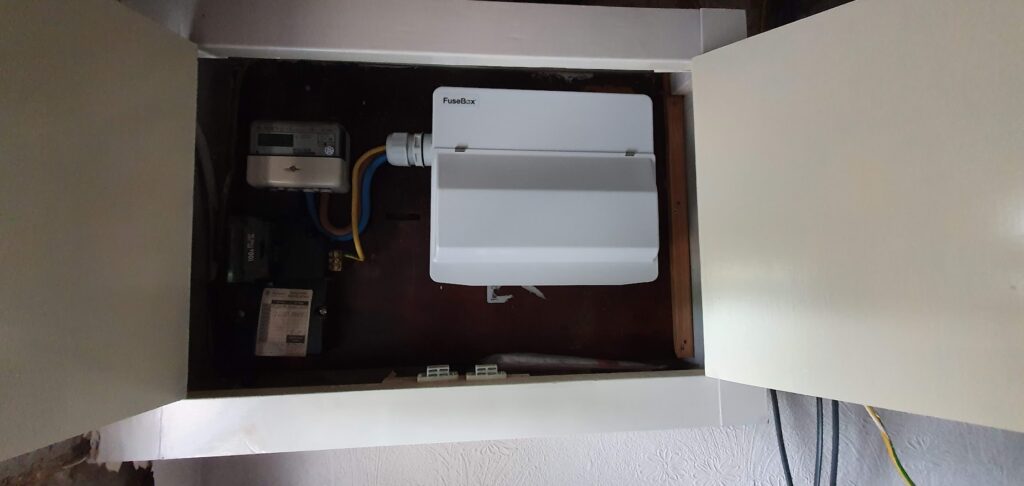
However, this came with a slight hiccup—after the full rewire, we were left without power! We enlisted the help of Nick Lundie from Nantwich (https://www.lundieelectrical.co.uk/), and I can’t recommend him and his team highly enough. They take great pride in their work, are incredibly flexible, and offered a lot of advice—especially since I didn’t have a fully fleshed-out vision at that stage. Fortunately, Nick set us up with one extension lead, giving us just enough power to light the house. Thank goodness 2020 was a sunny year, or we’d have been in real trouble!:

Order of Works for the Renovation
- Initial Assessment
- Deciding that skimming wouldn’t be enough for the renovation due to cold, damp conditions and inefficient insulation.
- Strip Back Walls and Ceilings
- Removed 120-year-old plaster (with horse hair) from the walls using a crowbar.
- Cleared the rubble and prepared the walls for further treatment.
- Assess and Treat Damp
- Discovered the walls had been chemically damp-proofed with cement by a previous owner.
- Used Safeguard’s Dryrods (drilling into the mortar) to treat rising damp.
- Rewire the Property
- Full rewire by electricians, completing the first fix quickly with everything stripped back.
- Replumb the Property
- Embedded plumbing into the walls using a mix of plastic and copper pipes.
- Replumbed the entire house from the downstairs, leaving the upstairs floor untouched.
- Reinsulate Internal Walls
- Baton walls, using Damp Membrane to seperate the wood from the walls.
- Insulated walls internally using PIR boards to improve energy efficiency without altering the exterior.
- Prepare for Finishing
- Reinforced or adjusted joists and floors where needed.
- Repaired any structural issues discovered during the strip-back phase.
- Finishing
- Applied new plasterboard.
- Plastered walls and ceilings.
- Prepared walls for final finishes (painting, wallpapering, etc.).
- Install Heating and Final Plumbing
- Connected radiators and ensured all plumbing systems were functioning properly.
- Final Electrical Fix
- Completed second fix of electrics (lighting, sockets, etc.).
