Where do we begin!
Our Kitchen Extension: A Dream Born from a Barn
For the last six years, Jen and I have been channelling our inner Del Boy—’This time next year, we’ll have a kitchen… this time next year, we’ll buy a proper kettle… this time next year, we’ll even have a sink!’ Well, it’s finally happening. Maybe not millionaires, completely the opposite, but at least we’ll have a place to wash the dishes.
Chapters
The Vision: Why We Chose This House
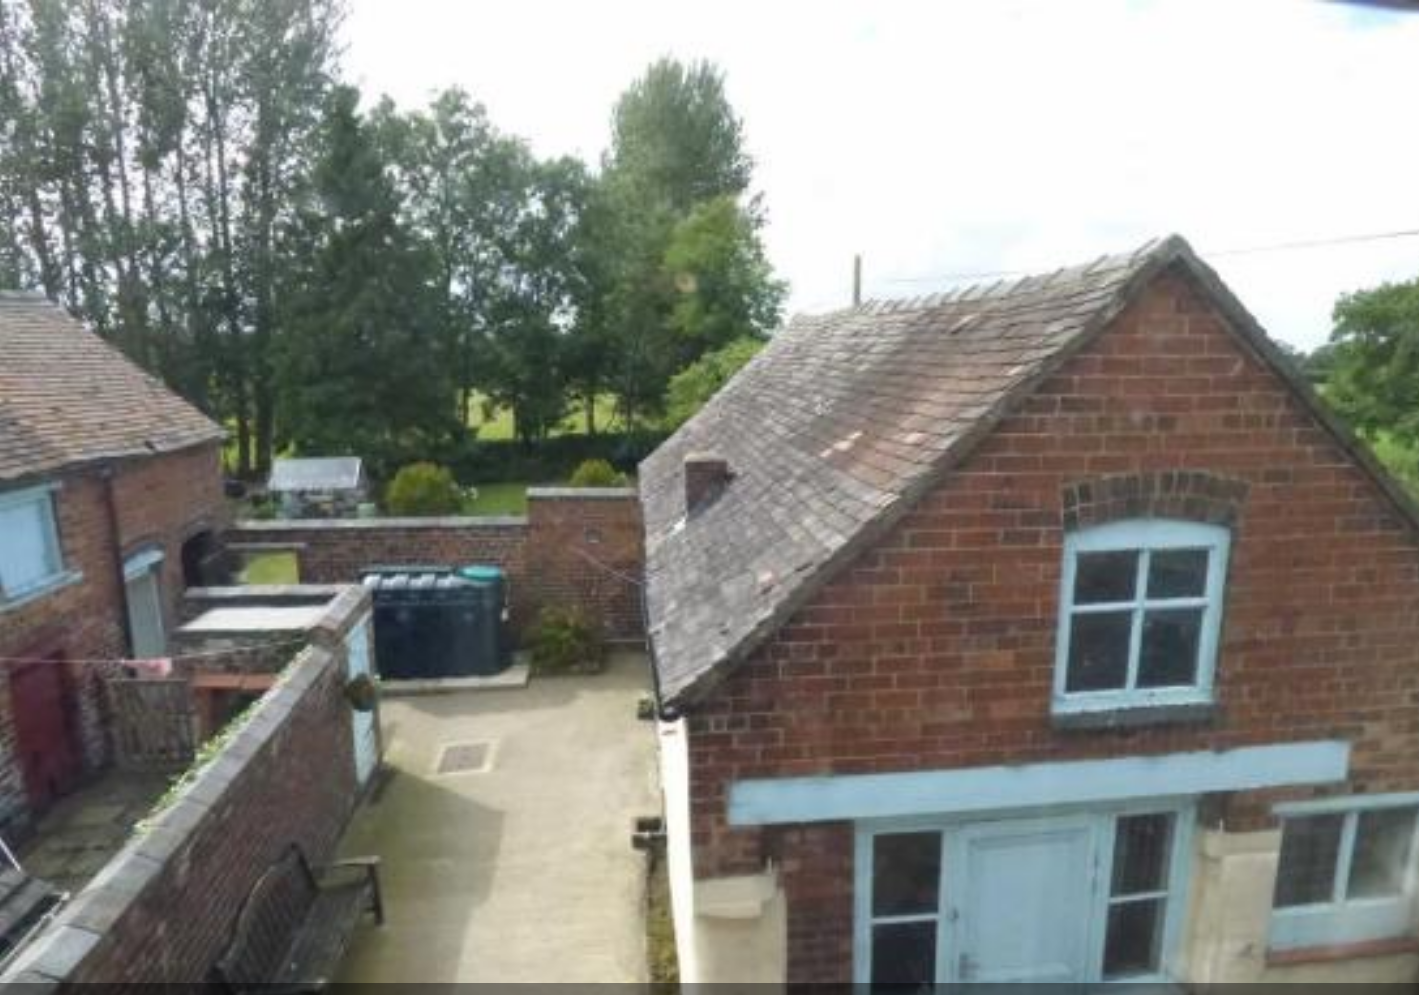
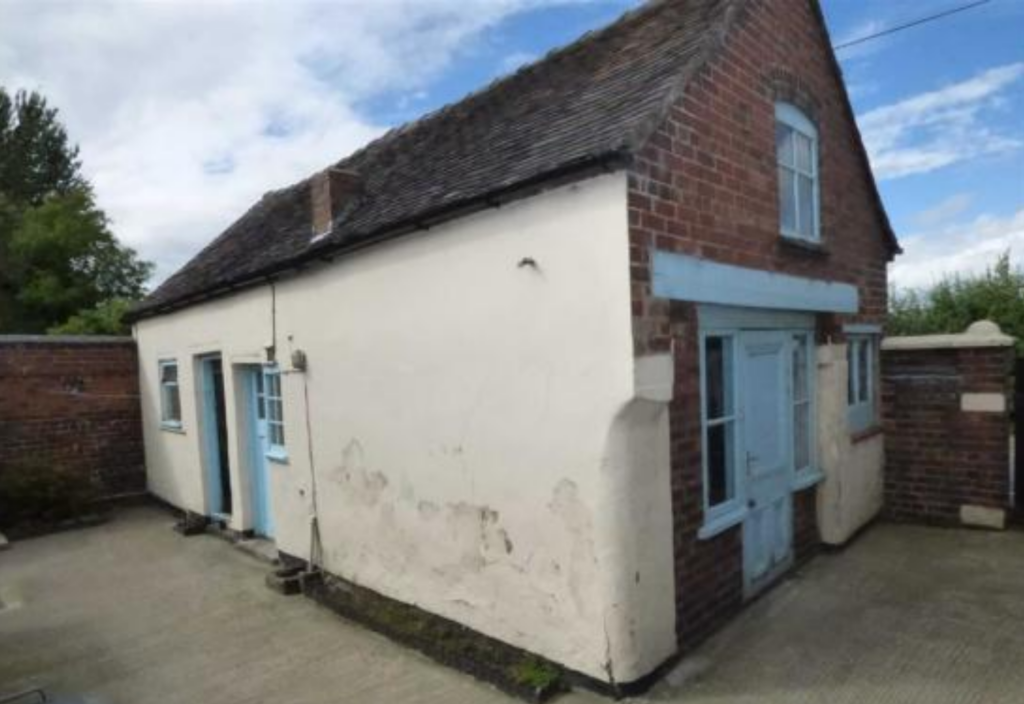
When we decided to buy our house, we knew we were taking a risk. The lack of a driveway was just one flaw among many, but what truly captivated us was the potential of the large outbuilding—a pitched-roof structure measuring 18m x 5m. Over the years, it had been used for various purposes: a milkman’s depot, a stable for horses and carts, and a soundproof music room, complete with layers upon layers of old carpet.
From the moment I stood in the music room, overlooking the vaulted space below, I envisioned a beautiful kitchen down below. I could vision a mezzanine level and a guest bedroom for our relatives who lived miles away. We were sold—not just on the house, but on the potential of the outbuilding.
Reality Sets In: The Challenges of Renovation
Once the sale was finalised, we jumped headfirst into planning our grand renovation. We quickly found a local architect who was eager to help us turn our vision into reality. He produced fantastic drawings that featured a spiral staircase leading to the gallery above the spacious kitchen, with a guest bedroom and en-suite shower room beneath. Planning approval came through without a hitch, and we were ready to build.
However, this is where things took a turn. When we sourced a local builder we were hit with an unexpected reality check. We had saved £30,000, which we naively thought would cover the shell of the building. The builder dug a test hole and discovered… there were no foundations! The cost to underpin the building would be around £30,000, just for 30 meters.
Then, he pointed out that the existing render was wicking up water from the yard, leading to frost damage at the bottom half of the building. Essentially, the structure was precariously floating on crumbling bricks. The devastating quote we received was £110,000 to repair and convert the old barn. We were crushed and left the idea for what we thought would be a short while but we didn’t see Covid coming.
A New Approach: Starting Fresh
After Covid and the renovation of the main house we revisited the idea of the outbuilding conversion and after consulting with three builders, it became clear that our best option was to demolish the old structure and start from scratch. We went back to the drawing board, hiring a new architect AVA from Congleton who produced entirely new plans. This time, we had to consider the reluctant constraints regarding the driveway (which you can read about on our Driveway Issues page).
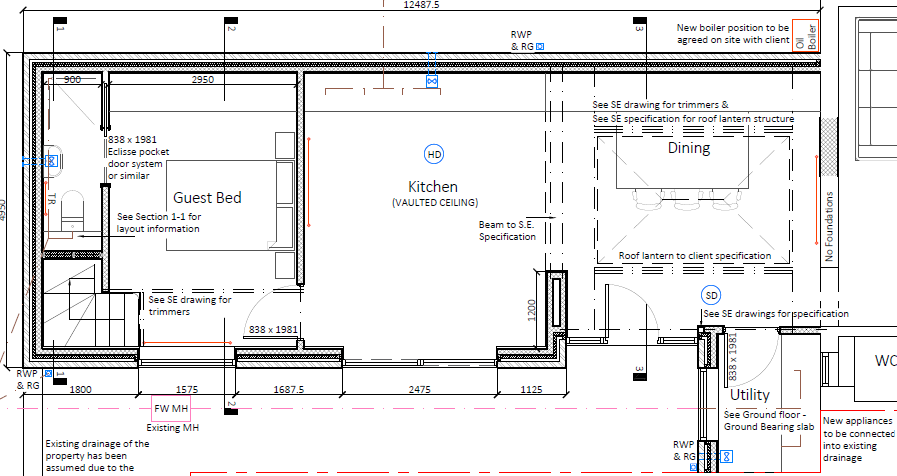
Our new plan involved demolishing the existing building and rebuilding it using the same footprint, but moving it 1 meter over from the boundary for better visibility from the new driveway. The layout would remain similar, with a vaulted kitchen and mezzanine, a guest bedroom beneath, and a large dining room with a glass lantern linking the old house, the old lean-to kitchen would now serve as our utility room.
However, we faced challenges beyond just planning. We were now post-pandemic and post-Brexit, and the cost of materials had skyrocketed since 2017, when we first moved in. The new quote for the complete renovation and demolition came in at £110,000.
Rolling Up Our Sleeves: DIY Demolition
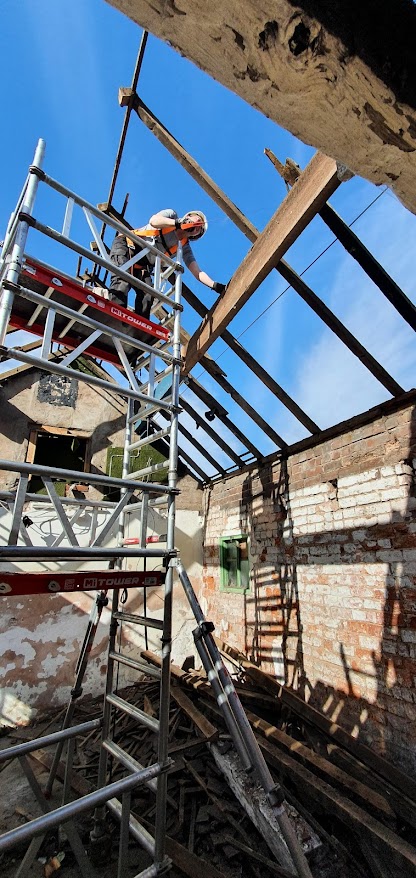
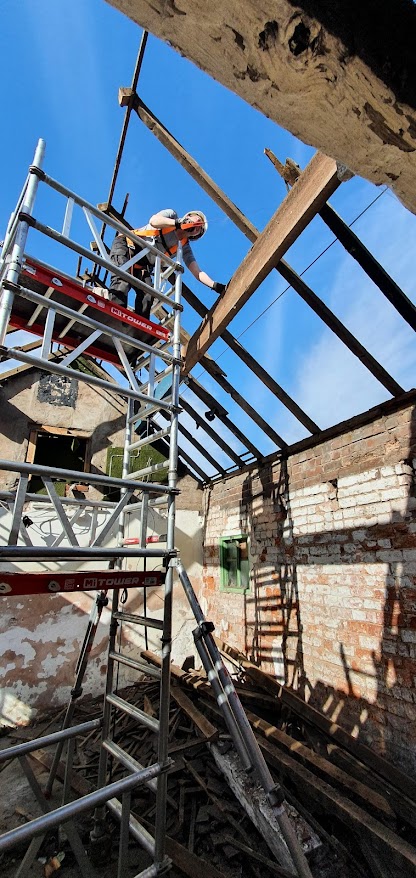
Determined to cut costs, Jen and I decided to tackle the demolition ourselves. We believed that removing the old building would help reduce the shell cost to £78,000. Our journey began with stripping the roof and removing the old carpet—a nerve-racking task without scaffolding.
Stubbornly, I thought I could manage everything from inside, but when it came to the vaulted 9m high roof, I found myself shaking with fear and I froze. Eventually, we conceded and purchased portable platforms, fall arrest harnesses, and hard hats. It was a small price to pay for safety.
Within a week, we had successfully stripped the roof down and made significant progress on the walls. Our dream kitchen extension was finally starting to take shape.
The Costs of Demolition: Breaking Ground on Our New Space
Progress in Week Two
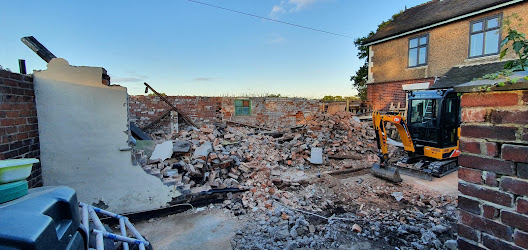
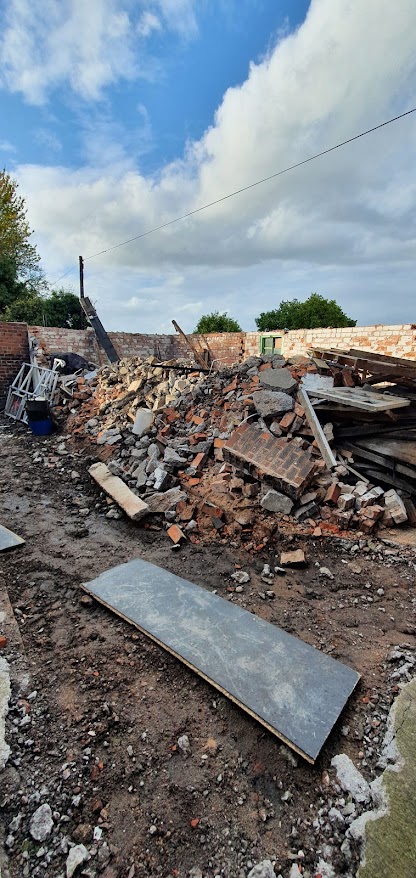
By the second week, we had successfully demolished the upper part of the building, leaving just the lower half to clear. This part was much easier since it was already crumbling. But that’s where the real fun began! We decided to hire a small digger to break up the concrete yard and the old slab from the barn.
At first, it was challenging to get the hang of operating the digger. I almost tipped it over a few times while whacking at the walls! However, after some trial and error, I started to master it.
The Right Equipment
I found a fantastic and friendly rental place in Stoke on Trent for the digger: ITP Hire. They provided great service at a good price, delivered on short notice, and didn’t charge for a waiver or insurance like some other hire companies (looking at you, HSS Hire).
The digger, equipped with a breaker attachment, made quick work of the concrete, leaving us with a massive pile of rubble.
Hidden Costs Revealed
Now, the hidden costs. Each collection of rubble set us back £380 for 18 tons, and we had five collections! This led me to wonder: would it have been cheaper to have the builder handle the demolition?
While the yard now looked bare and it was sad to see the old barn gone, we remained optimistic. We decided that the mezzanine would now serve as a music and hobbies room for the girls, paying homage to the building’s history.
The New Builder: Enter Chris & Team
With the old barn cleared away and a new vision in place, it was time to bring on the new builder! We were excited to take the next steps in our renovation journey.
Finding the Right Builder
After all the challenges we had faced, bringing in Chris Hughes Joinery and his team was a breath of fresh air. It was such a pleasure to work with a builder who was not only friendly but also fully understood our vision. Chris was upfront with all the costs, and we discussed every aspect of the project before a single hammer was lifted.
One of the most important things Chris did was agree on costs and set a clear payment plan for each milestone. This approach was a game-changer, as no money exchanged hands until each phase was completed. If you’re starting a renovation, I highly recommend ensuring this process is in place with your builder so you’re protected every step of the way.
Laying the Foundations
Chris and his team got right to work, scraping back the area to level the ground and laying out the foundation. Progress was incredible—within a week, the foundations were poured, and materials started arriving on-site.
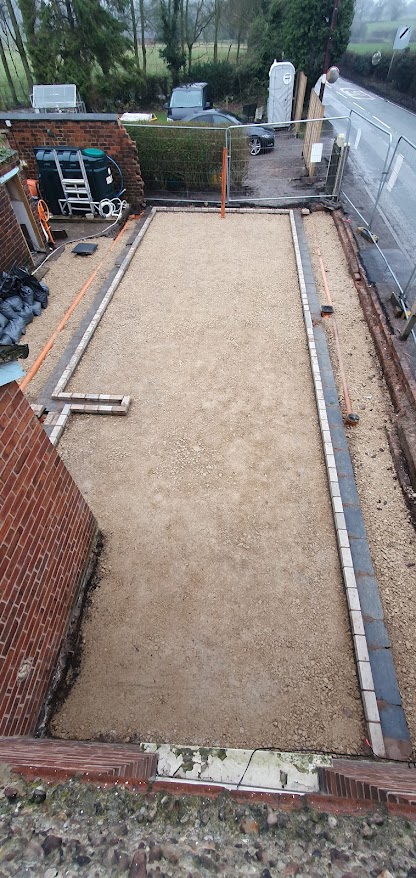
Finally, we could see the true footprint of the extension and walk through the layout. We were amazed. Our architect had originally said there wouldn’t be enough room for a kitchen island and that the mezzanine would be too small to stand up in. However, everyone who saw the building was blown away by the size. In fact, it doubled the square footage of our house! Even Chris said it was the biggest extension he had ever done. Jokes aside, it was truly massive, and we were beyond excited to finally be on the path to having our dream kitchen.
The Fastest Progress!
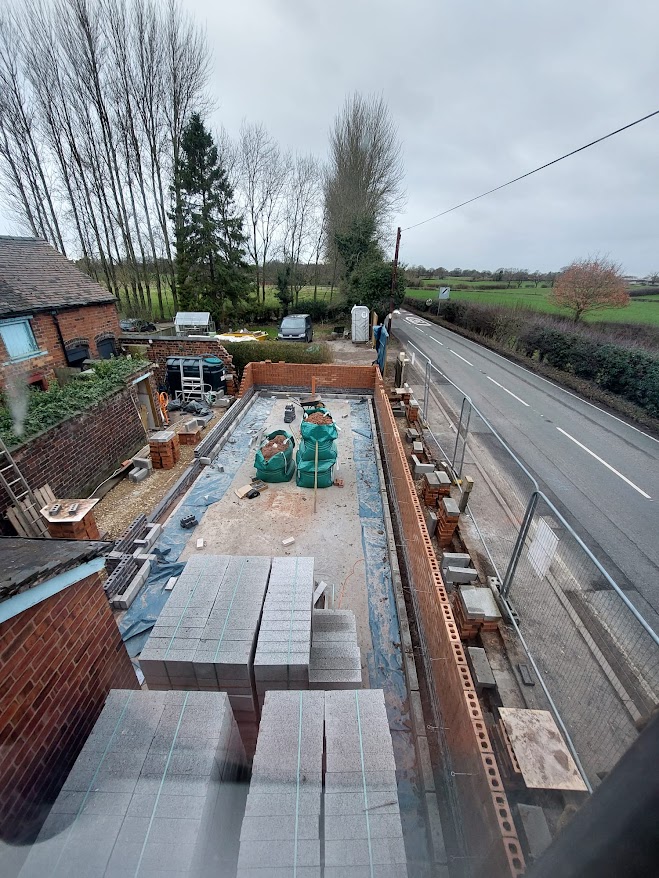
By February, the walls were shooting up, thanks to some of the fastest bricklayers I had ever seen. I had to travel for work for two days, and when I returned, the walls were already at lintel height! The pace was rapid, and before we knew it, scaffolding went up, and more materials for the roof structure were delivered.
The Struggle in the Meantime
While all this progress was happening, our old kitchen was partially demolished, leaving us to wash dishes in the bath—a horrendous time, to say the least! But with the excitement of the build and seeing the extension come to life, we managed to keep going.
February Progress: Walls Up, Roof Structure in Place
The Grand Transformation Begins
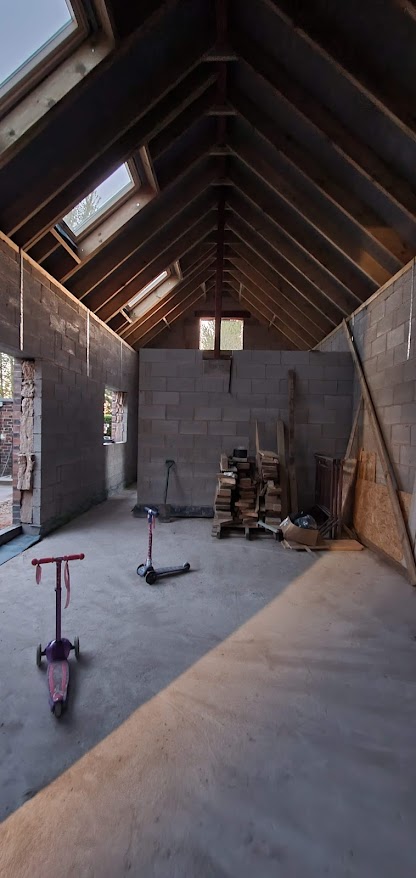
By the end of February, the walls were complete, and it was time to tackle the roof structure. This was where the true grandeur of the build started to emerge. The old outbuilding, once a crumbling memory of the past, was being resurrected like a phoenix from the ashes. As the beautiful pitched roof began to take shape, it was clear the old girl was back!

We could see the heads of passing drivers turning to stare at the transformation. It was always amusing to watch their mouths gape in awe as they passed by. That is, until a speeding BMW driver, not paying attention to the traffic ahead, swerved hard left to avoid rear-ending a stationary car. Instead, they ploughed straight into our garden wall.
The Crash
In an instant, our peaceful build turned into a scene of chaos. The BMW smashed into the house and garden wall, narrowly missing the builders working at the rear of the property. Thankfully, the cottage stood up to the impact sustaining only a scrape, while the garden wall took the brunt of the damage. We were incredibly lucky that no one was hurt—what a close call!
Roof Construction: A Grand Design Moment
Despite the mishap, construction continued. The scaffolders set up the huge platform, and soon, pallets of roof tiles, steels, and timber began arriving on-site. The roof went up beautifully, and as the sun began to make an early appearance in March, Chris and his team were enjoying the work—looking more olive-skinned and rosy-cheeked by the day.
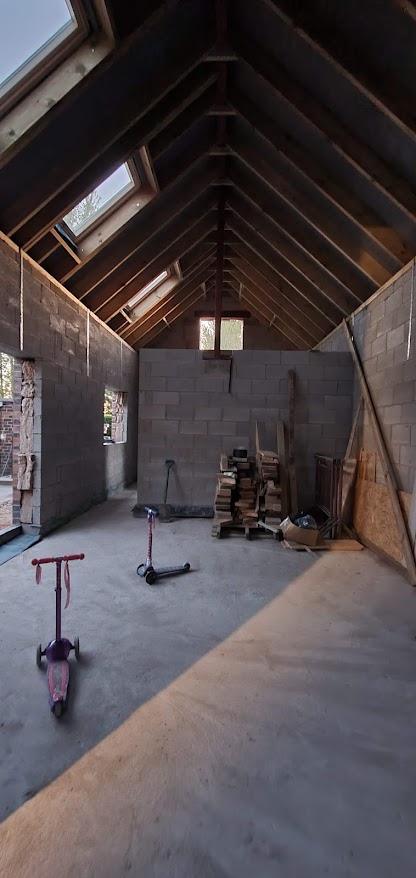
This was a major milestone for us, and we were eager to celebrate. Inspired by too many episodes of Grand Designs, I had always envisioned a topping-out party, complete with beers on the roof. However, the reality turned out to be pizza and alcohol-free beer (since everyone was driving), but still, it was a moment to remember. The girls now had a £100’000 skate park to them selves which they loved.
Glazing: Where You Can Really Save
DIY to Save Costs
If you’re planning an extension, glazing is one area where you can make substantial savings—if you’re willing to put in some work. As I’ve mentioned before, I always look for ways to cut costs, and glazing was no exception. Now, I’m no professional window fitter, and my experience with windows was practically non-existent, but how hard could it be to screw a frame to some bricks?
Chris, our builder, kindly offered to install all the roof glazing. However, I decided to take on the challenge of fitting the windows and doors myself. Not only for the personal satisfaction but also because it would save us a fraction of the cost.
The Savings
Let’s break it down. The original quote we received included:
- £3,000 for a 2m roof lantern (plus fitting)
- £980 each for the Velux windows (which were electric opening)
- £6,600 for the windows (plus fitting)
The total cost was £12,500, which didn’t sit well with me. So, I did some digging.
Roof Lantern and Velux Windows
I found a fantastic deal through LB Supplies LB Roof Windows, where we ordered a 3m Korniche roof lantern for £3,113—a larger lantern for the same price as the original 2m quote and the Korniche range is incredible looking! Additionally, I purchased 3 Liteleader roof windows for £258 each, a fraction of the cost of the electric Velux ones.
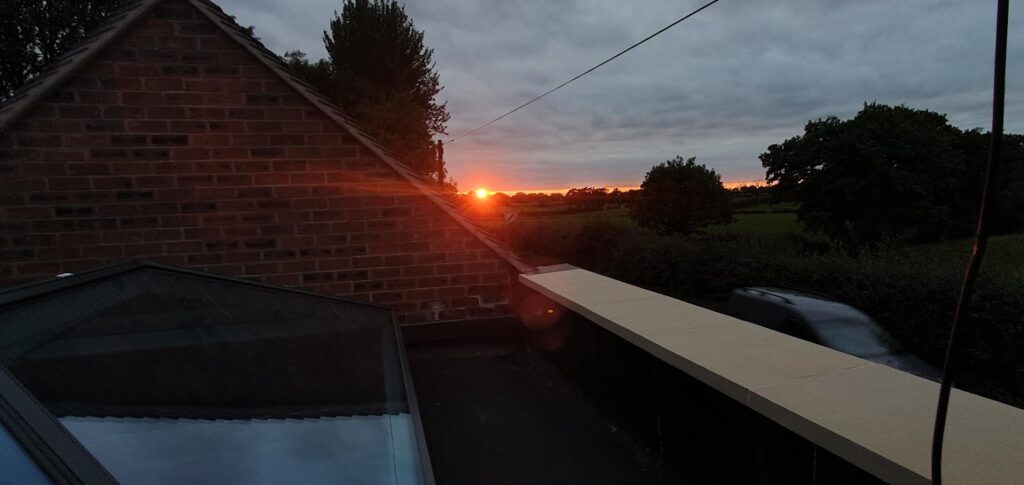
Windows and Doors
For the bifold doors and windows, I found an amazing company called Modern UPVC Windows, not only is their website really easy to use but I had to ring them with some issues I had that was totally my fault (I forgot to size an opening for a fire escape) they sorted the issue and even give me a discount. They supplied 3 large windows, a 2.5m Korniche bifold door, and a solid double entrance door for a total of £4,400.
Total Cost Breakdown
Instead of paying the original £12,500, I spent:
- £3,113 on the roof lantern
- £774 on the roof windows
- £4,400 on windows and doors
Total: £8,287—a huge saving of over £4,000!
Fitting the Windows and Doors
If you’re a competent DIYer, fitting windows and doors can be a straightforward task—especially with fresh, square, and neat brickwork. I’ll include a detailed guide [here] for those who want a step-by-step tutorial. For now, here’s how I approached it.
Installing the Windows
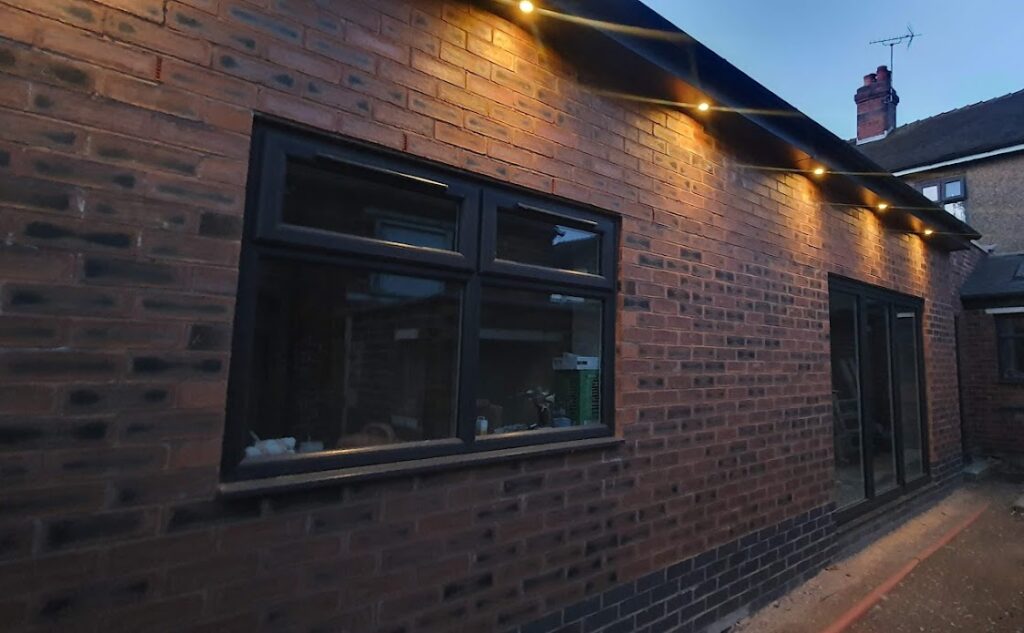
The windows were surprisingly easy to install. It took me a few days to get the windows installed and a couple more evenings finishing the sealant. After the kids went to bed, I spent a few evenings perfecting the silicone finish, and I have to say, Everbuild’s Silicone 825 is a dream to work with. You can find it at Toolstation—it looks fantastic in Anthracite and gives a sleek, professional finish.
Tip. Mask the window and brickwork with masking tape, then using a wet smooth stick of wood, smooth the silicone using water and dish soap.
The Bifold Doors Challenge
Now, the bifold doors were a different story. They were tricky to fit, and I ended up having to trim a few millimetres off the brickwork to get them to fit properly. In my eagerness, I hadn’t accounted for the cill or the necessary expansion gap, as I didn’t want them to expand with heat and jam. After a bit of fiddling, they went in perfectly—and the final result was worth it.
Another Milestone: Water Tight!
With the windows and bifolds in place, we reached another significant milestone—we were water tight. A huge thanks to Chris and his team for their fantastic work. The whole process was stress-free, and even the building inspector complimented the neat and tidy work site. It’s a great feeling to see everything coming together!
Taking Over from the Builders
After Chris and his talented team cleared the site and handed the building back to me, I suddenly found myself at the helm of the renovation. The reality hit hard: it was just me, a massive to-do list, and the challenge of balancing this project with a full-time job and my two little girls. The list seemed endless: insulating the roof, plasterboarding the walls, plumbing in the underfloor heating (UFH), screeding the floor, adding the mezzanine floor, handling all the carpentry—including stairs and doors—second-fixing the bathrooms, painting, and decorating. Bring on the late nights!
First Up: The Lean-To Roof
The first task was to rebuild the existing lean-to roof, which required some serious structural changes. The old roof was made of asbestos sheets, a hazardous material that needed careful removal before I could proceed. Although I had learned a lot from Chris during his work on the extension, taking on such a substantial job solo was another matter entirely.
I ordered 200mm rafters and attached a wall plate to the wall using resin anchor bolts. These bolts provide incredible strength, and I was impressed by how securely they held. I could practically feel the walls sigh with relief. The original roof was held by 6-inch nails embedded in the mortar, and they fell out with just a gentle tug!
However, this is where it got tricky. The lean-to roof had to follow the angle of the house, which isn’t square with the road or the new extension. So, while my wall plate had to align with the lean-to and house wall, the rafters had to follow the extension wall’s angle. It was a complex puzzle! To make matters worse, I had to cut birds’ mouths and ridge cuts while calculating the correct lengths and angles. Cue two hours on YouTube! One video by Mr. A Builders here was particularly helpful.
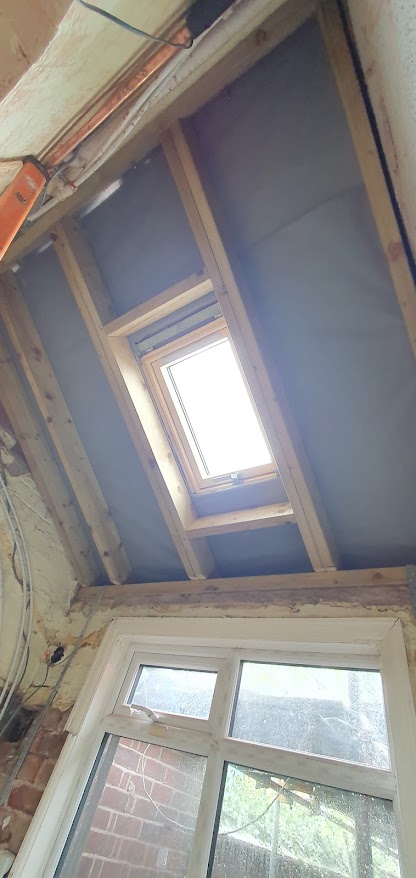
Once I got the first rafter right, the rest became easier—more of a copy-and-paste exercise, as I ensured that the wall plate and ridge plate were and equal distance and square from each other at both ends. After securing the rafters with long joist screws, installing the felt, battens, and tiles was a breeze. Chris even called to check on my progress, offering to help one weekend. His compliments about my work felt like a pat on the back!
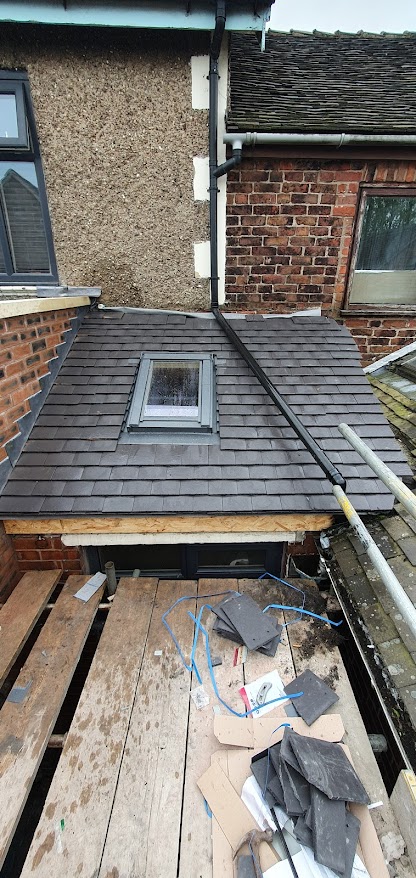
I managed to add the lead flashing to the wall, I should learn the terminology but all that is now left is the flashing at the ridge and the facia.
Insulation: A True Challenge
With the roof securely in place, it was time for insulation. Oh, how I underestimated this job! I thought I could knock it out in a week. In reality, it took two months of sweat and determination. T summer heat was relentless, and the building was heating up like an oven. I often found myself working late at night in nothing but shorts and mask, which was a sight.
Task One: Purchase insulation boards. I needed 21 x 150mm PIR insulation boards and 30 x 30mm Kingspan Cooltherm boards. I sourced them from Seconds and Co for £1,800—a significant saving.
Task Two: Cutting the boards to size. I remembered seeing Robin Clevett from SkillBuilder make a cutting table to help cut the boards neatly, which seemed like a genius idea. I built a similar setup with a pre-set cutting guide to the width of the rafters, complete with a drain pipe I had drilled holes into and attached to my vacuum to extract dust while cutting. However, it turns out that cutting insulation boards generates a cloud of dust, no matter how well you prepare and especially when bashing them in-between the rafters! I also had to build a temporary secun flood using long lengths of timber wedged into the steel and sitting on the mezzanine! Ye Ha!
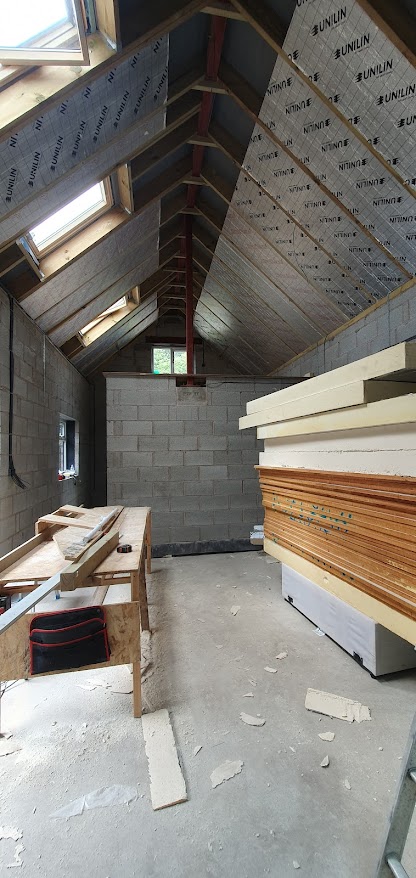
The actual installation was physically demanding. I had to carefully measure each board to ensure a snug fit, which took time and patience. I didn’t want any gaps for heat to escape! The process was frustrating and tedious; some nights, I would simply stare at the boards, dreading the task ahead. I found cutting them at angles top and bottom ensured a snug fit at the wall plate and steel ridge, and by cutting the joins at angles I was able to make a wedge the ensured the boards overlapped and held each other in place with no gaps.
Despite the challenges, I pushed through and with plenty of eye washes later the insulation was in, I felt a sense of accomplishment knowing that was in, Bring in the Building Inspector.
The Building Inspector Arrives
By this point, I had become obsessed with sealing every gap in the insulation. With all the talk about using GapoTape to ensure no gaps would form between the rafters and insulation, or that gaps might open up over time as things dried out, I was anxious that the inspector would fail me, forcing a complete redo. Looking back, it feels like a load of nonsense, but at the time, I couldn’t stop thinking about it.
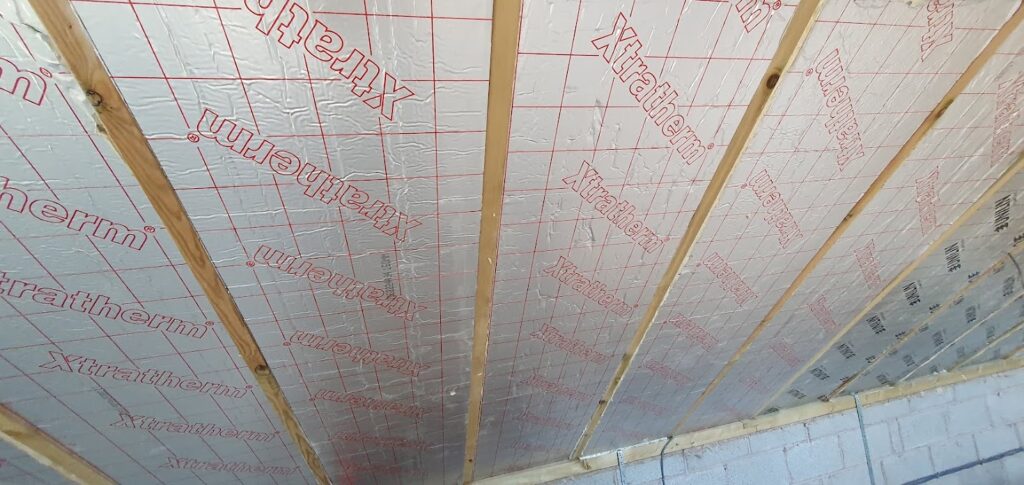
GapoTape would have cost me £800—money I didn’t want to spend—so I decided to take matters into my own hands. Instead of using GapoTape, I cut the insulation boards slightly larger by about a millimeter and came up with a clever workaround. I screwed ratchet straps to the rafters, allowing me to flex them apart just enough to squeeze the insulation in. Once I released the straps, the rafters squeezed the boards tight, leaving absolutely no gaps. After that, I taped every single inch of the joins to form a vapor barrier.
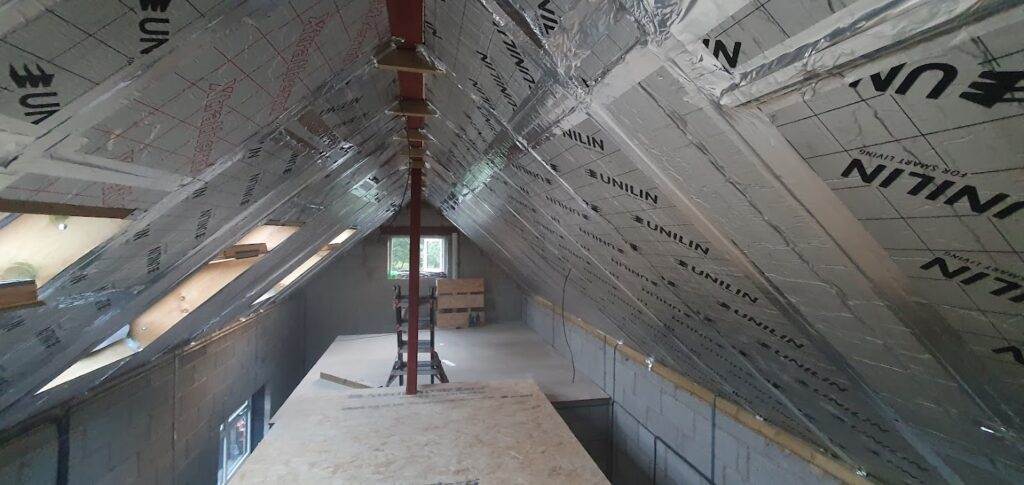
Once the main insulation was in place, I overboarded the entire ceiling with Kingspan Cooltherm high-performance boards and taped the joins again, creating a second vapor barrier. It was airtight and, to be honest, looked fantastic! I couldn’t help but feel proud of the work. I had gone over every detail, photographing each join to prove the high standard of my work.
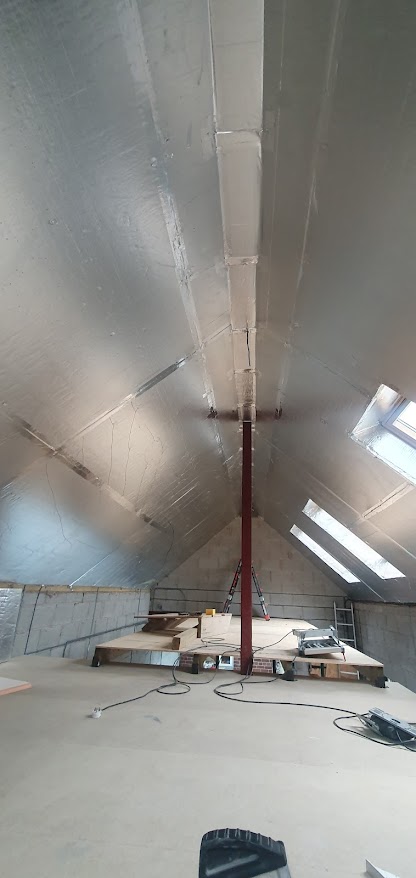
Then, the day came: the building inspector arrived. I had dreaded this moment for weeks. I was ready to walk him through every inch of insulation, bracing for the potential nightmare of being told something wasn’t up to standard. But to my surprise, he didn’t even glance at the insulation.
Instead, he made a bee-line for a window.
The Window Mishap
The inspector immediately measured the window opening, not the insulation. It was 0.32m², just shy of the 0.33m² required by building regulations for ventilation. My heart sank. I hadn’t accounted for the window sill properly. The measurement had to be taken from the outside sill to the edge of the window, and the sill had eaten up just enough space to make the window too small.
“Bollocks!” I thought. Now I had to replace the window.
Still, I managed to get a replacement for £245 from ModernUPVC and they agreed to a discount to help me out, their Customer Service is top notch and I highly recommend them, which wasn’t the end of the world, considering I was still well under the £6,600 quoted for a company to supply and fit them. Once that was sorted, the inspector signed off on the insulation, which was a huge relief. Even better, because I had started laying down the floor insulation, he signed that off too.
The Devastating News
Just when I thought the inspection ordeal was over, the inspector dropped a bombshell. The owner of the building inspection company was due to retire, and with new regulations coming into effect following the Grenfell disaster, he had decided to shut up shop. He gave me one month to get the entire project signed off, or else I’d have to start over with a new Building Control company.
This was an absolute nightmare. My stress levels hit the roof as I realized the implications. Thousands of pounds could be wasted if I didn’t finish on time. Worse, what if a new company refused to take on the project? They hadn’t seen the work in progress and might not sign off on anything already covered up.
For weeks, I was consumed by panic. There was no way I could finish everything in time, and my mind was racing with worst-case scenarios. I even started thinking, “What if it doesn’t get signed off?” They couldn’t force me to demolish the building, could they? Surely they’d have to check it over, rely on the photos, and accept the reports we already had.
But at some point, I had to let go of the worry. What would happen would happen, and all I could do was push forward.
Moving Forward: The Next Milestone
With the insulation boards finally laid, I took a deep breath and focused on the next step: First Fix Plumbing and laying the underfloor heating (UFH). Another big task loomed ahead, but at least I was moving forward.
The Toll of the Project
I honestly thought I would have this building finished by now. All those late nights spent on the insulation were starting to take a real toll on me. Jen, ever perceptive, noticed I was losing weight and looking weaker by the day. My temper had become short, and the stress of juggling everything—working a managerial job during the day, looking after two children in the evening, and then working on the house into the early hours—was becoming painfully obvious to everyone around me.
Jen finally stepped in and insisted I get some help. I didn’t realise how much I needed it until she said it out loud.
Enter Lee No.2
That’s when Lee No.2 came onto the scene—a local plumber from Alsager. With our house running on a Combi Oil boiler, the hot water had always been a problem. It would run tepid whenever we had multiple showers or a bath, and with us adding another bathroom, the likelihood of two showers running at once was almost certain, especially once the girls became teenagers.
Lee had a great solution: installing an unvented cylinder to store a large amount of hot water. Since we had good water pressure, this setup would allow for consistent hot water even with both showers running. It turned out to be an even better idea than I initially thought.
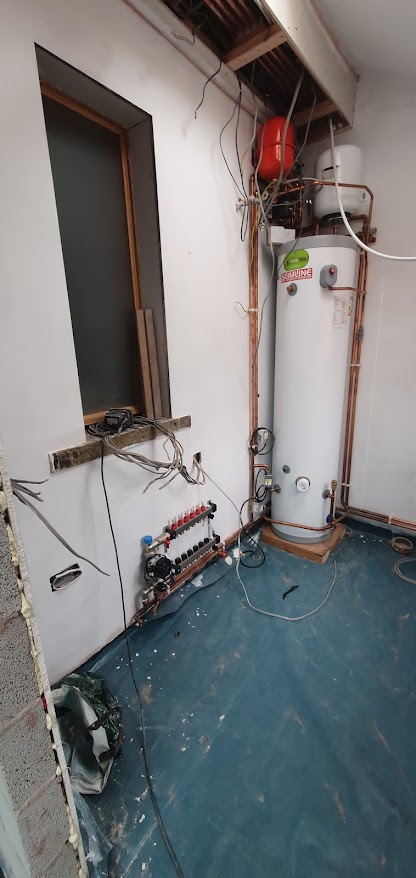
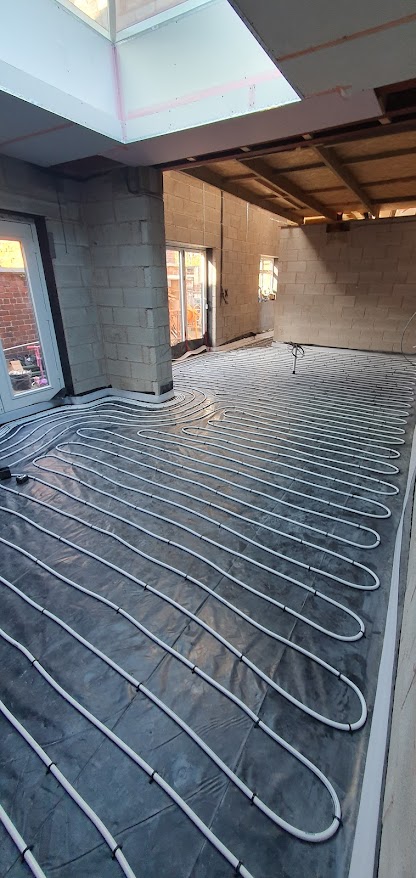
Lee handled the first-fix plumbing, installed the unvented cylinder, and laid the underfloor heating (UFH). It was a huge relief to sit back for once and watch someone else shout at the walls, although Lee was much calmer about it than I ever was. He was a true pro. And we called back in the electricians to wire in the room thermostats and UFH control unit form Heatmiser.
Within a week, the UFH was down, and the cylinder was plumbed in. It looked fantastic and was a massive step in dragging our old rundown cottage—still complete with its charming but inconvenient outside lavatory—into the 21st century.
The Boiler Drama
But of course, there was always something else. The old boiler was originally sited in what would now be the new dining room. It was an outside boiler, located in the yard, but with the new extension, we needed to move it a few meters over, outside the new walls.
These boilers, though, do not like to be moved, and our 10-year-old boiler didn’t disappoint in causing problems. Right after Lee finished his work and just as I was preparing to leave for another business trip, the boiler packed in.
I was desperate to get it working again. I didn’t want to call in an expert and have another unexpected expense, so I took it upon myself to fix it. First, I replaced the pump, as it wasn’t kicking in when the heat was called for. After fitting the new pump, there was no change. Next, I tried a new diverter motor—still nothing.
By sheer chance, I stumbled across a microswitch inside the diverter valve housing, and after replacing that, the boiler finally fired up. We had heat! It wasn’t a day too soon, either—I was so stressed at the thought of leaving Jen and the kids without hot water while I was away.
But with the heat back on and the water scorching, the boiler, like Trigger’s Broom, had gained a few new parts and was ready for action again.
Moving Forward: Screed and Plasterboards
With the boiler crisis behind me, it was time for the next milestone: laying the screed and installing the plasterboards. At last, I could start putting my Goldtrowel construction training into practice. It felt like real progress—finally moving beyond the unseen aspects of the project like insulation and plumbing and getting to something more tangible.
The Screed and the Plaster Marathon ahead
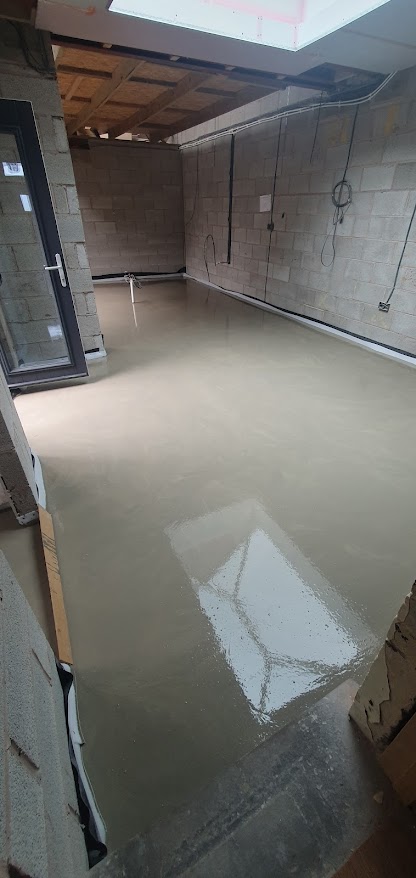
The screed was one of the smoother parts of the project. I ran with a company recommended by Lee the Plumber, and they came within a week, pouring the liquid screed in just a day. No dramas, no mishaps—it went down perfectly, and as strange as it sounds, the drying screed had this amazing smell. It was a quick win, but that was just the calm before the real storm: plasterboarding.
Tackling the Vaulted Ceiling
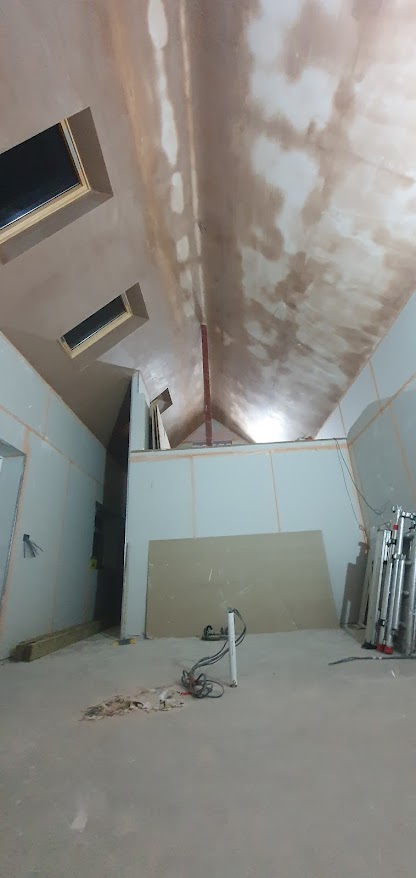
With winter approaching and the dark nights closing in, I took a week off work to speed things up. Plasterboarding itself is straightforward, but it’s also messy, and getting everything square and plumb is harder than it looks. Especially when you’re dealing with walls close to 4 meters high and have to balance on a ladder.
The vaulted ceiling, however, was a nightmare. Trying to maneuver a full sheet of plasterboard by yourself at that height is terrifying. To make it a bit easier, I improvised with a wooden off-cut, screwing it into the rafter to act as a temporary support. It let me slide the board into place while holding it steady enough to get a few screws in before it could fall.
Despite the challenges, the boarding was eventually completed, and I moved on to the next task: taping the joints with scrim and the seemingly endless beads for the corners and window reveals before plastering over them with Multifinish plaster.
Lighting Dilemmas
While dealing with the ceiling, I also had a brainwave: I wanted to uplight the vaulted ceiling with LED profiles. I’d first thought of it after the electricians had first-fixed the wiring, but I hadn’t really planned out the details properly. For weeks, I scoured the internet looking for architrave or coving that would allow me to hide the LED strips and direct the light upward.
Finally, I found a curved LED profile that sunk into the wall just enough to project light upwards in a smooth arc—perfect for the vaulted ceiling. This setup would also illuminate the hallway and lead up to the stairs. In addition to that, I had ordered LED eyelid stair lights and had built a tray around the roof lantern to house another strip of LED lights.
To see how it all turned out, check out this page on the lighting we used.
The Plastering Challenge: Enter My Brother
Now came the part I really couldn’t face doing on my own: plastering. Fortunately, my brother is a plasterer, but he lives too far away to help me full-time, and, let’s face it, mates’ rates don’t really apply, even if you’re family. Still, I was beyond grateful for his help, as this was a monumental task.
Let me put it in perspective: we had to plaster a vaulted ceiling that was 9 meters long. Because it would be impossible to get a perfectly neat straight line along the top, we had to curve the ridge using bonding plaster. That meant plastering both sides of the ceiling in one go—a whopping 54m² in total. The scale of the job was daunting.
To top it off, my shoulders were already aching from holding up all the plasterboards. Could I really face plastering such a huge area after that? The curved ridge added an extra layer of difficulty, requiring precision, and plastering both sides at once meant no breaks—we had to get it right the first time.
Extra Time
My brother, being a plasterer, came prepared with an ace up his sleeve: Extratime Plaster Retarder from Eazymix. These little stress-relieving sachets not only slowed down the setting time but also made the plaster mix lovely and creamy. At first, it seemed like they were working perfectly—we were cruising through the first half of the vaulted ceiling, thinking we had it all under control.
But, of course, nothing ever goes as smoothly as planned. By the time we started on the second half, the plaster began to firm up. Panic set in. Our shoulders were screaming from the effort of holding trowels overhead for hours, and the constant running up and down the work platform and ladders had turned our calves into fireballs. Exhausted and short-tempered, we started snapping at each other, and to make matters worse, we had no labourer to help with the grunt work—no one to make a brew or even throw together a sandwich.
To add to the stress, the only tap we had was upstairs in the bathroom of the main house. So, every time we needed water for mixing plaster or cleaning tools, I had to ferry buckets down the stairs, through the house, across the massive extension, and then up a ladder to the work platform. It was absolute torture.
And as if things couldn’t get worse, plastering a ceiling has a funny way of making the sun come out. Suddenly, the room turned into a sauna, with the sun beating down on us through the windows. We were dripping with sweat, trying to plaster before the mix set rock hard. By the time we hit the 5 p.m. mark, we were exhausted, sore, and desperately trying to clean up. 12 bags of plaster in one hit, and I’m not plasterer.
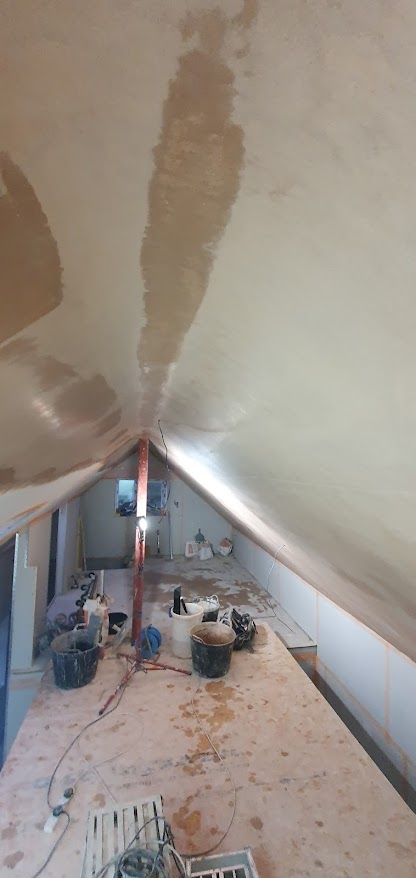
I started to worry that my earlier grand idea of uplighting the ceiling would only highlight every imperfection after the job turned out to be a marathon of four letter words and not perfection. Still, at that moment, I was just relieved that it was done. Perfect or not, the job was finally behind us.
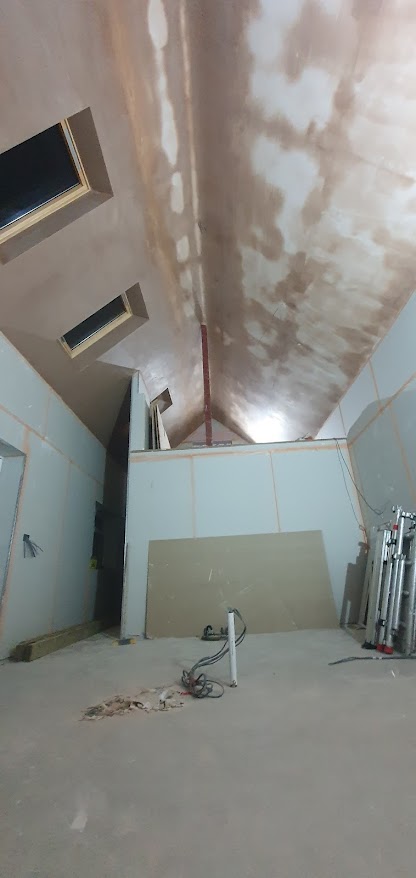
The Vaulted Ceiling: A Milestone Moment
Taking down the temporary platform was a momentous occasion. After months of working on the vaulted ceiling, we could finally see the grandeur of the space—like a miniature cathedral in our home. With the screed down and plasterboarding complete, it was time to dive headfirst into the next challenge: plastering.
If there’s one tip I can offer to anyone planning a renovation, it’s to invest in a plastering course. Learning to skim walls and ceilings to a good standard will save you a fortune in labor costs. Once you get past the initial panic, plastering can be quite therapeutic. I did my course at Gold Trowel Construction, and they really throw you into the deep end, offering guidance as you go. It’s all about practice—eventually, you stop throwing the plaster all over yourself and start getting it on the walls where it belongs!
When the temperature’s right and the plaster’s not setting too fast, you can hit a nice rhythm. With my headphones on, I found myself in a flow, especially when tackling the large gable wall. That was a huge accomplishment for me, and I remember feeling so happy when it was done. But I hadn’t made the job easy for myself—between the LED lighting profiles, the angles around the lantern and mezzanine, and all the beadwork, I had plenty of tricky areas to navigate.
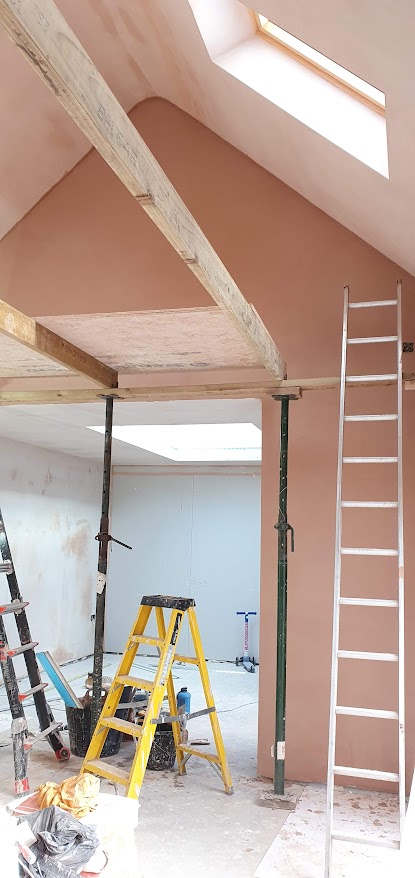
Looking back, the extra effort was worth it, though it didn’t always feel that way at the time. One lesson I learned the hard way: plastering late at night under artificial light makes it nearly impossible to spot imperfections until the morning when it’s too late to fix them.
Of course, the worst part of plastering has to be cleaning buckets and trowels. After a while, I gave up—I can’t even count how many buckets full of dried plaster ended up in the skip. It got to the point where I just bought new ones instead of scrubbing them clean.
Still, after two months of work—plastering a wall each night, with plenty of breaks in between—we finished. It was December by then, and we took time off for the holidays and a much-needed trip abroad. By February, we were back at it, and I’d finally finished plastering.
The Staircase: Assembling a Centerpiece
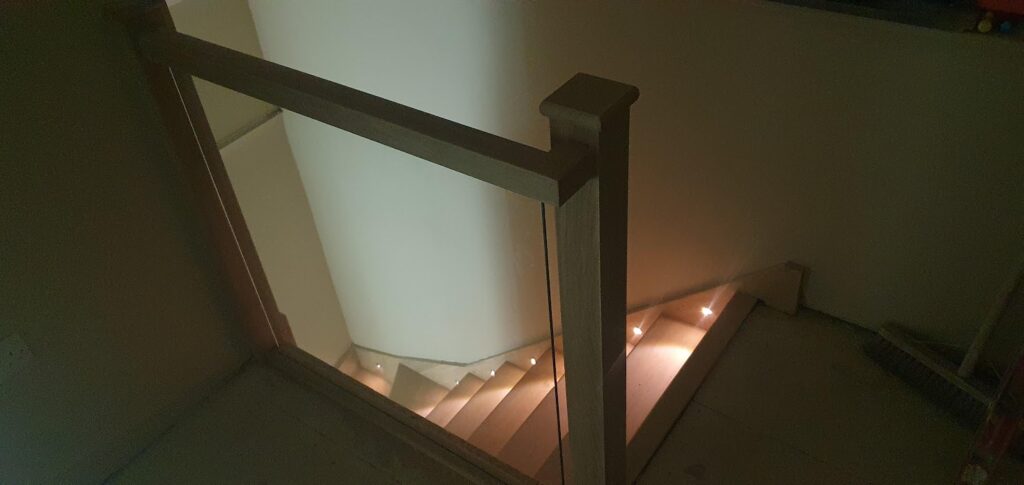
Next up was the staircase—I ordered an oak winder from Stairbox, and I have to say, they were fantastic to deal with. Their online design tool made it easy to get exactly what we needed, and the assembly process was straightforward. In a single day, I had the staircase up, and it looked amazing. We added eyelid lights to the stringer to illuminate the steps, which added a touch of elegance to the whole thing.
The Paint Decision: Switching from Farrow & Ball
With the stairs up, it was time to paint. We hired a local painter and decorator to spray the walls and ceiling all one color, which took a whopping 50 liters of paint. I’ve always been a sucker for Farrow & Ball paints—the marketing about their unique pigments had me convinced they were the best. But at nearly £980 for the amount we needed, the decorator suggested we try Johnstone’s instead.
After getting a color match from Johnstone’s Paint to the Farrow & Ball sample, I’m officially converted. Their acrylic durable matt paint was not only beautiful but also much more durable—you can even scrub it! And the price difference? Massive. We got 50 liters for £368, thanks to a trade discount from Johnstone’s in Crewe. They were so friendly, and the paint looks incredible. I’ll never buy Farrow & Ball again.
A Homecoming Moment
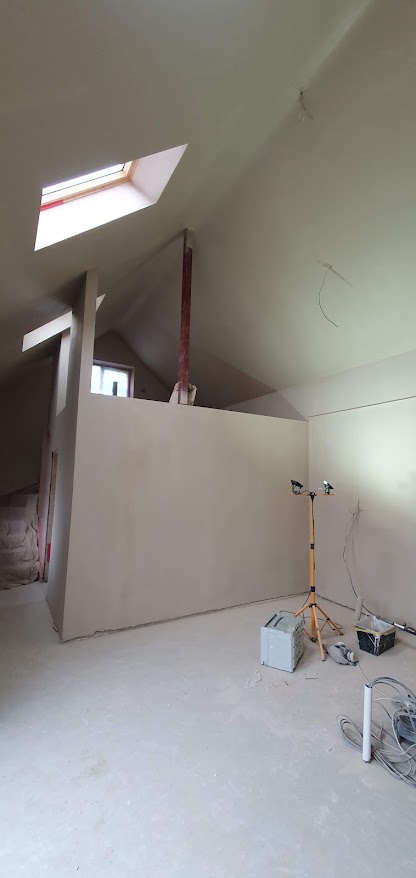
Finally, it was all starting to come together. What was once just a brick shell now looked like a habitable home. Some days, I’d just sit on the floor and admire the view up to the mezzanine, feeling proud of how far we’d come. We still had a long way to go, but this was a huge milestone—one that made all the late nights, stress, and bucket-filled skips feel worthwhile.
The Decoration Phase: Costs Spiral, but Progress Accelerates
Now, onto the interior decoration—and this is where things really started to spiral out of control. By this point, our patience was wearing thin. We were both desperate to get the building finished and move in. The endless routine of washing pots in the bath was driving us mad, and it led to more than a few arguments. Something had to give.
So, we decided to take out a series of large loans to finally push things forward. The first major task? Flooring. We had debated between tiles and wood, but from the very start, we had our hearts set on polished concrete. Unfortunately, we just didn’t have the time or money for that option by the time we needed to make a decision. That’s when we started looking at microcement.
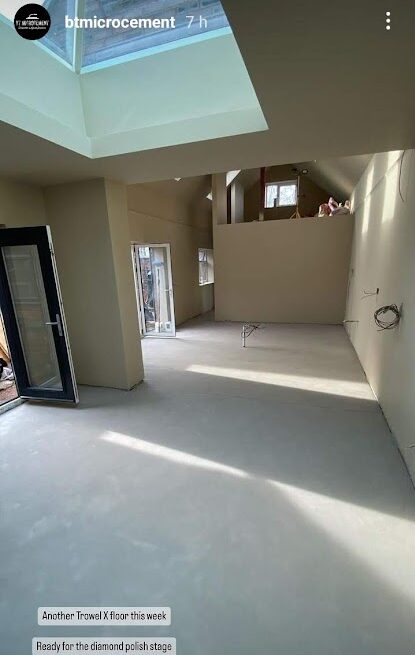
We found Forcrete at www.forcrete.co.uk, and their work looked amazing. After reaching out to a local installer, BTMicrocement (www.btmicrocement.co.uk), we had some samples brought over. However, microcement wasn’t cheap—£11k to cover the floors set us back quite a bit, but when we factored in the cost of tiles and an installer for 96m², it wasn’t much different at £114 p/m2 it may have been cheaper than tiles. With the help of a cash injection, we decided to go for it.
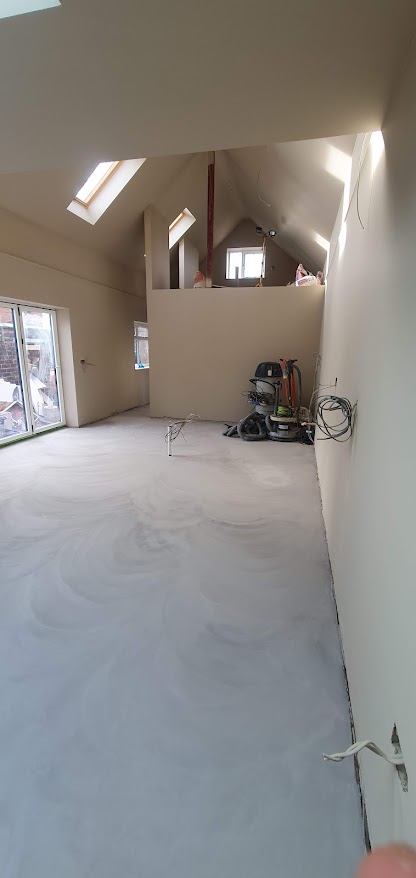
BTMicrocement did an incredible job. Their attention to detail and perfectionism were clear as they made the floor smooth and flat by diamond grinding the surface. The finish was stunning—the floor shines beautifully and is so easy to clean, with no grout lines to worry about. We even invested in an expensive but worthwhile shower tray to create a wet room in the en-suite. The linear tray was microcemented, leaving a narrow drain for the water and a gentle gradient for it to flow down. We absolutely love it.
Cue the Kitchen: One Step Closer
With the flooring complete, the next major step was the kitchen. We were getting there, finally seeing the light at the end of the tunnel. Jump to The Kitchen Project to follow more progress.

